This is a build log for a custom set of speakers I built for a friend.
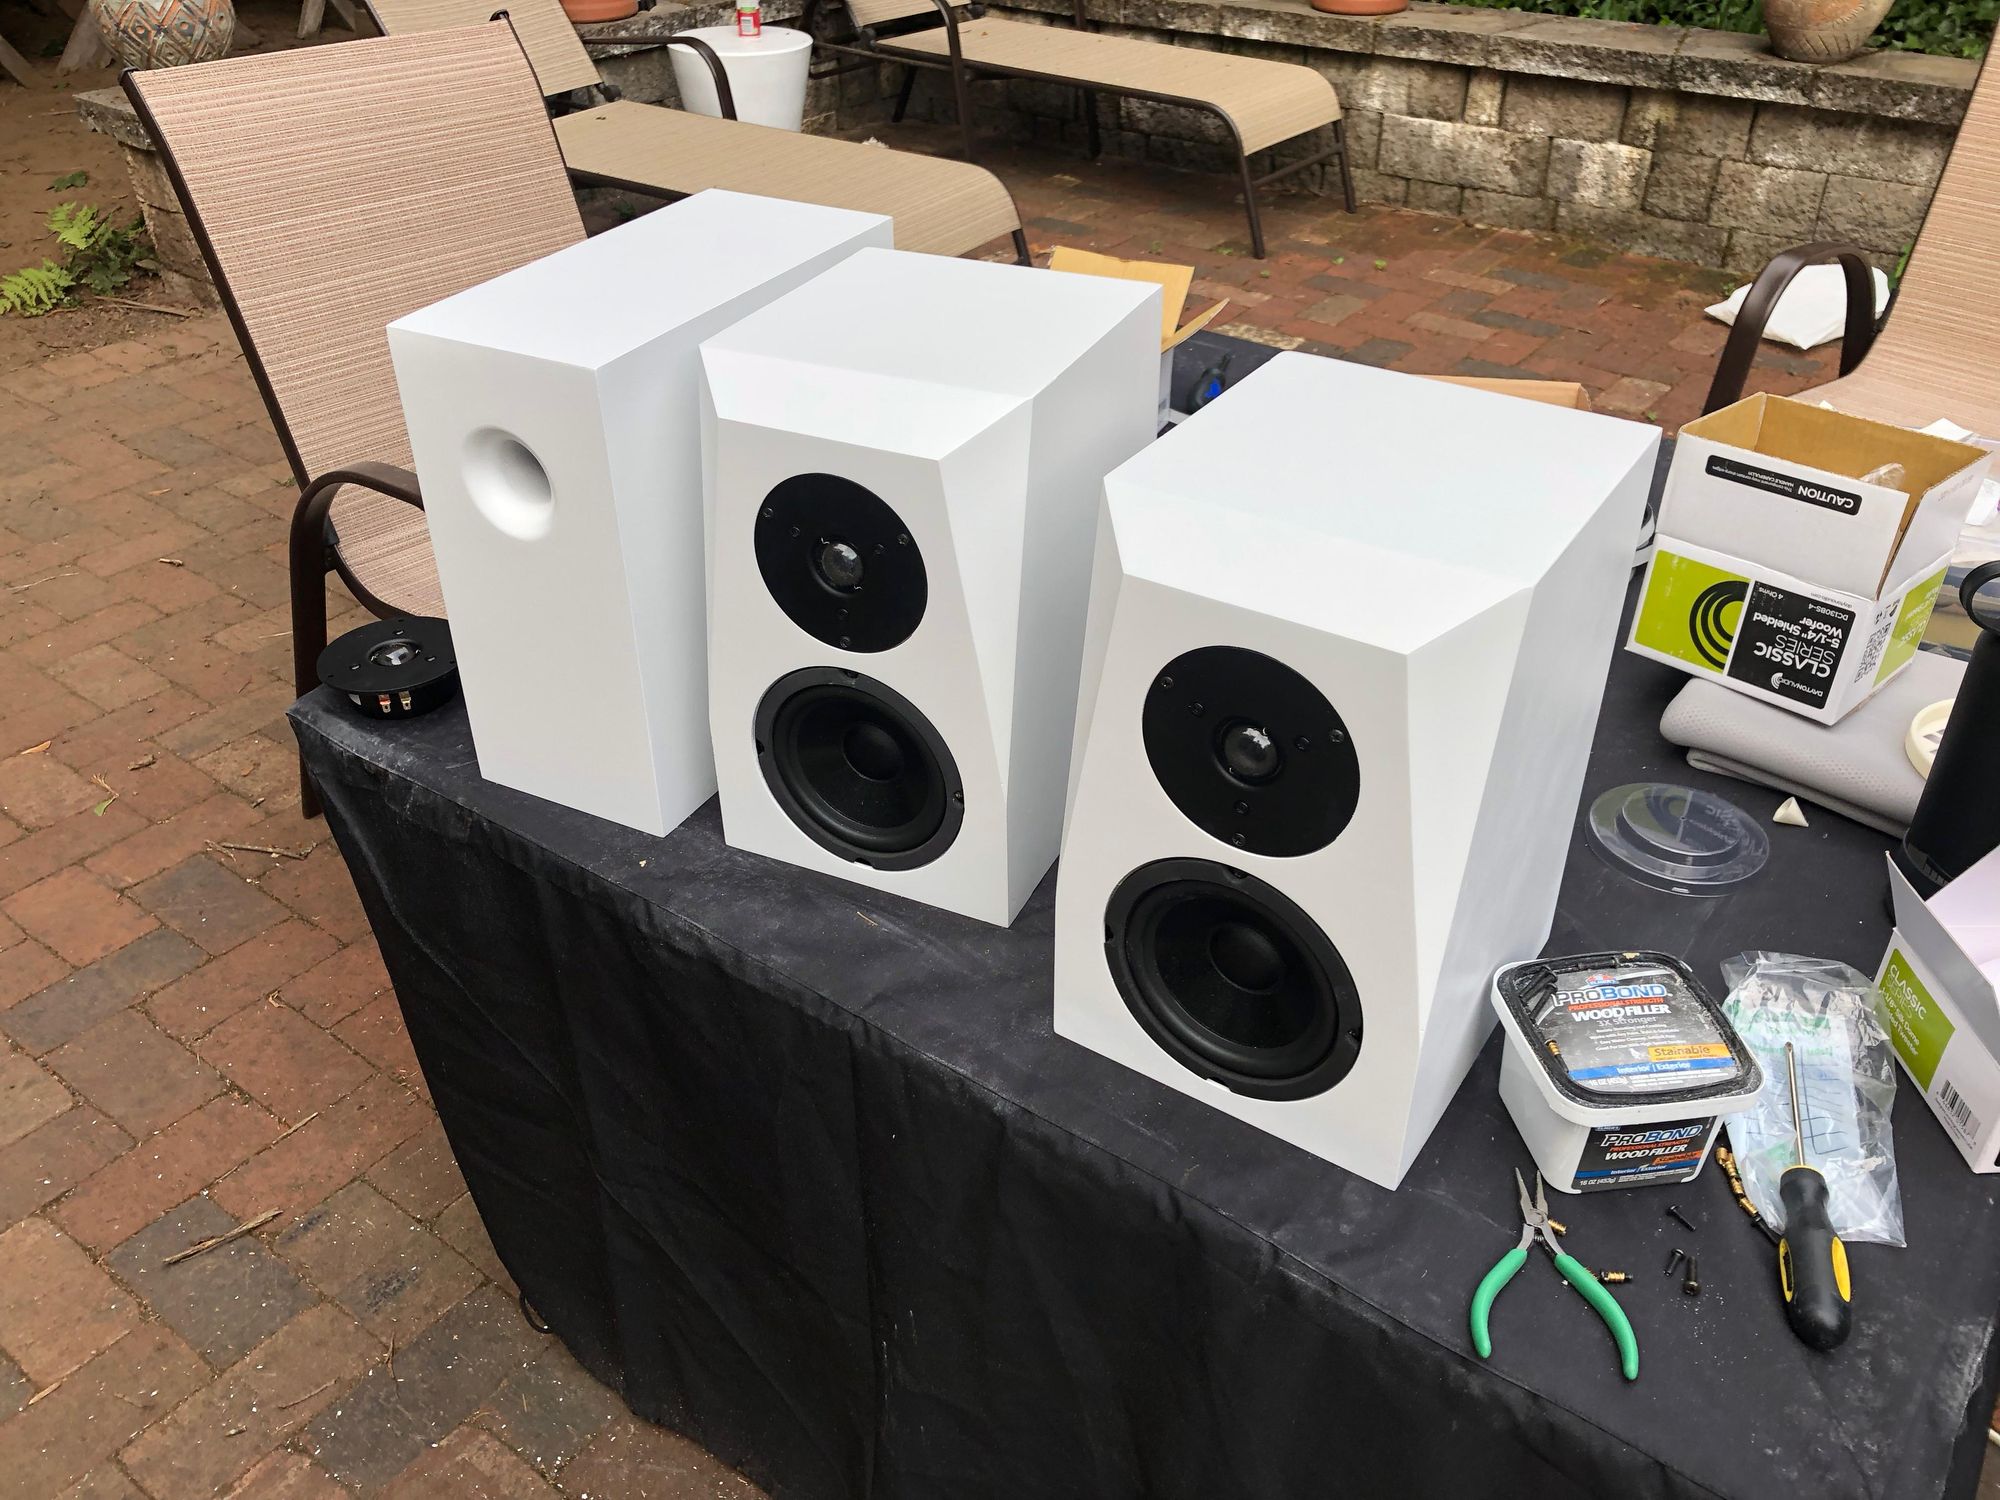
Started with some 18mm Baltic Birch plywood.Ripped into 8" strips and glued togetherI cut four blanks for the front baffles in case I made any mistakesI cut the facets using a taper jig at 10 degrees and the blade set at 45 degrees. I use a Jasper hold cutting jig for the circular cutouts on speaker buildsTest fit of the wooferSince the front baffles are so thick, I used a 45 degree chamfer bit to make some room for airflow behind the woofer.I 3D printed the ports using the PLA Woodfill filament from Hatchbox. This material sands and finishes very similar to MDF and its really nice for speaker design.Finished port with flares on both endsThis is after sanding with 60 grit sandpaper. Its really hard to tell the pieces are 3d printed at all after sanding them.The ports are designed to sit a bit proud of the wood (0.5mm) so that I can sand the entire surface to be flush.This is the design for the speaker terminals. I printed them out of Wooffill PLA, too. I designed this crossover board for the speakers and had it fab'd by OSHPark.Mounted crossovers, terminal blocks, and ports onto the back panel. The crossovers are mounted onto soft foam with 4 wood screws in the corner.My favorite part of the project -- it looks like a speaker!
I made a subwoofer similar to the "Voxel" design from Paul Carmody. I made it slightly larger, increased the port diameter, tuned slightly lower, and added a Lepai plate amplifier. I am *very* impressed with the output for the size. That said, this particular subwoofer is a little underpowered to be paired with the TriTrix speaker design if it is required to supply all of the bass. Instead of crossing over the speakers to the subwoofer, I am using the subwoofer for a bit of extension and to fill out the room modes.
In the final arrangement, I put a 30Hz HPF on both the speakers and subwoofer, and a 120Hz LPF on the subwoofer with a smooth rolloff. I also turned down the subwoofer relative to the speakers a bit. I use a similar arrangement on my system at home and I really like how it creates smooth and consistent bass throughout the listening environment. It tends to work best if the subwoofer is relatively close to the speakers.
The subwoofer port was printed in three pieces. The interior is smooth without steps. In hindsight,I could have made the bend less aggressive, but chuffing has not been an issue anyway.Flush-mounted the port just like on the speakersI glued and screwed a board to the inside of the box so that the subwoofer driver can sit recessed down into the box.First listening test, they sound good!Here is the subwoofer next to the speakers for reference. Here is the grill cover I made for the subwoofer. I ended up creating this design with some inspiration from the "holders" people use for cross-stitching. The "teeth" on the top of the ring grip the material and pull it tight.This is the first test fit. The excess material is trimmed before mounting.Fabric is held tight.And the grill is a press-fit. I ended up making the final grill covering silver instead of white since it was too difficult to color-match the fabric to the white paint of the woofer.With all the pieces functionally finished, its time for sanding and paintingI hung each piece from a tree branch in our backyeard for painting. First coat of paint applied. It looks good in the picture, but I was actually pretty discouraged at this point since they looked pretty rough and a lot of blemishes were showing through. White paint is NOT forgiving!Applied some Bondo, and re-sanded the speakers.Repeat paint+bondo+sand some more..Nearly finished.. Final paint finish is really clean.
In the end, I applied 24 coats of paint over 6 paint sessions. Each "session" I applied four light coats of paint 8 minutes apart. Then waited 24 hours and started the filling/sanding process and doing it again. The finish turned out great and is very durable.
I am driving the speakers with a 200W class D amp from Lepai and did some fine-tuning and room correction with a miniDSP.Final shot of the speaker before packing it up and delivering it. Sad to see them go!